|
Working with ASP.NET Master Pages |
| What are ASP.NET Master Pages |
|
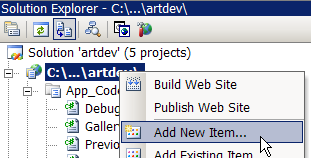
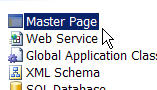
ASP.NET Master Pages are essentially templates - at the most basic level, they are very similar to the templates found in web design tools like Dreamweaver. Many ASP.NET projects involve a large number of .aspx pages which could share a lot of higher-level functionality like navigation controls, etc, but each have some specialized controls, too. The wrong way to solve this problem is to cut-and-paste the navigation controls onto each .aspx page. It's the wrong way because inevitably you will want to change one of the navigation controls, and then you're going to have to cut-and-paste all over again. A Master Page allows you to avoid duplicating all the common controls. Instead you create a template .aspx page which has the extension .master. Visual Studio .NET 2005 includes an "Add New Item" template for Master Pages:
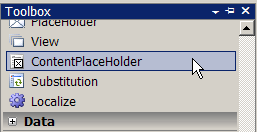
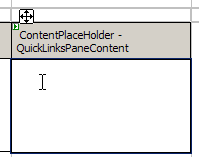
Once you've made the Master Page, you can add <asp:ContentPlaceHolder> elements from the Toolbox. The ContentPlaceHolder regions are where you will put page-specific controls:
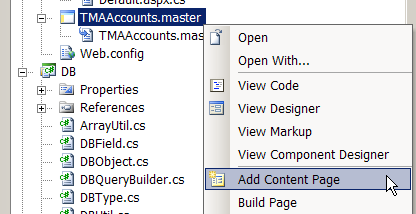
Now that you have a ContentPlaceHolder, you can create a Content page. Content pages are .aspx pages which "inherit" from your .master Master Page. Right-click on your Master Page and pick "Add Content Page" from the pop-up menu:
You'll notice that any controls on the Master Page which are outside of a ContentPlaceHolder are grayed-out in the Content page. You can only change the placeholder regions. Any changes made to the Master Page will automatically propagate to the Content pages. This makes it easy to update your site layout. You can even nest Master Pages, although the Visual Studio form designer doesn't support this, so you'd have to resort to hand-coding your ASP pages. You probably don't want to do this... For more information on Master Pages, check out these two articles - Master Pages in ASP.NET 2.0 and Master Pages: Tips, Tricks, and Traps. |
| Master Page Name Mangling |
|
Each ASP.NET page has an ID associated with it, accessed using the "ID" property. Most of the time this ID doesn't really matter. But when you use a Master Page, the Master Page ID is pre-pended to all controls on the content page. So, if you had a control called "CheckBox1" on the Master Page, it's ID will be rewritten as "ctl00_CheckBox1". And if you add a control called "CheckBox2" to a ContentPlaceHolder called "Region1" on your content page, it's ID will be rewritten as "ctl00_Region1_CheckBox2". You might wonder why "CheckBox1" became "ctl00_CheckBox1". Well, that's because unless you assign your own ID to the Master Page, it's ID will be generated automatically, and "ctl00" is the ID of the first Master Page. If you want, you can set your own Master Page ID, but you have to make sure it happens in the right place. You'll have to add a Page_Init() function for your master page. Here is a sample function in C#, which you would paste into your .master.cs file:
protected void Page_Init( object sender, EventArgs e )
{
// this must be done in Page_Init or the controls
Now "ctl00_CheckBox1" will instead be "MyMasterPageID_CheckBox1". Master Page name mangling can also cause problems for client-side Javascript. In the HTML forms that are generated from your .aspx file, the field names for .aspx controls will also be rewritten. All the underscores ("_") in the rewritten names will be replaced with dollar-signs ("$"). So "ctl00_CheckBox1" becomes "ctl00$CheckBox1" and "ctl00_Region1_CheckBox2" becomes "ctl00$Region1$CheckBox2". There isn't really a great way to handle name-mangling in client-side javascript. The quickie solution is to hard-code the mangled names into your javascript code. But that can be a maintainability nightmare. A few alternatives are described on this page (search it for "name mangling") |
|
Questions?Comments?
Email rms@unknownroad.com. |